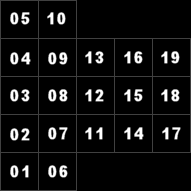
The droids can see a total of 19 cells. The cells are layed out like this:
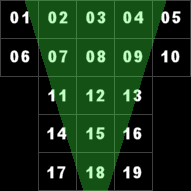
That includes the cell the droids are standing which, in the case of the image above, is cell 18 with the droids looking upward toward cell 15.
Making life easier
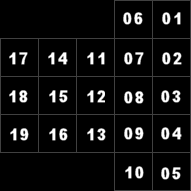
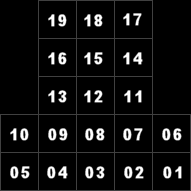
At every screen refresh, the system needs to look at each cell and determine what needs to be drawn. Although it sounds easy to say "Cell 7 is located 3 steps forward and 1 step to the left", it's more complicated than that because of the four directions the droids can be facing. To rescan all cells while facing north, the system will scan from 4 cells in front down to our current position, and from 2 cells to the left to 2 cells to the right. If facing east, the system will need to scan from 4 cells to the right down to our current position, and from 2 cells up to 2 cells down. Here are images to better explain it with the droids always located at cell 18:
 |
 |
 |
 |
So now, if cell 7 needs to be drawn while facing east, the system will need to look 1 cell forward and 3 cell to the right. If facing south, the same cell is instead located 3 cells back and 1 cell to the right. With 19 cells and 4 directions, that's a lot of coordinates.
To make it easier to process each cell regardless of the direction the droids are facing, the first step is to make a perfect copy of the visible cells from the appropriate location to a fixed location as if the droids were always facing north. Not only this greatly simplifies future operations, but the system is now free to do what it wants to this copy of the map section without affecting the real map.
Optimization
A cell may be completely hidden by a standard wall. To speed up the rendering process, the next step is to determine which cells are not visible to the droids. Depending on where a wall is located, some cells will be converted into totally empty cells in the copied map section. Here is part of the list of cells converted into empty cells depending on wall locations:
- If there is a wall at cell 9, the three cells 4, 5 and 10 will not be visible, so clear cells 4, 5, and 10
- A wall at 7, clear 1, 2 and 6
- Wall at 11, 14, or 17: Clear 1 and 6
- Wall at 13, 16, or 19: Clear 5 and 10
- Wall at 15: Clear 3, 8, and 12
- Wall at 12: Clear 3 and 8
- Wall at 8: Clear 3
- Walls at 15 and 17: Clear 1, 2, 3, 6, 7, 8, 11, 12 and 14
- Walls at 15 and 14: Clear 1, 2, 3, 6, 7, 8, 11 and 12
- Walls at 15 and 11: Clear 1, 2, 3, 6, 7 and 8
- Walls at 15 and 19: Clear 3, 4, 5, 8, 9, 12, 13 and 16
- Walls at 15 and 16: Clear 3, 4, 5, 8, 9, 12 and 13
- Walls at 15 and 13: Clear 3, 4, 5, 8, 9 and 12
- ...and more...
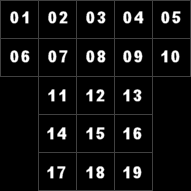
You may simulate this process by clicking in the cells below to add or remove walls. Green cells are drawn/visible cells, yellow cells are wall cells and red cells are not visible (and cleared) cells.
| 01 | 02 | 03 | 04 | 05 |
| 06 | 07 | 08 | 09 | 10 |
| 11 | 12 | 13 | ||
| 14 | 15 | 16 | ||
| 17 | 18 | 19 |
Drawing order
Once this cleaning process is done, it's time to draw the view. Since objects in the front hide objects in the back, the view has to be drawn from back to front. The first row (cells 1 to 5) is too far to display objects or encounters, but close enough to display walls between the first and second row (cells 6 to 10), so the system will draw these first.
In our mind, we imagine a wall as a solid block filling a cell, but to the system, a wall consists of 4 separate panels with each one separating 2 individual cells. In the technical page "Disk Directory", the fed7 images show each panels as used by the system. This is rather important to understand when it is time to draw each individual cell. In the case of the walls between the first and second row, the system only needs to draw the front panel between cells 1 and 6, and nothing will ever be drawn between cells 1 and 2.
Respecting the idea to first draw cells that could be hidden by other cells, the next step is to draw the farthest cells which are now cells 6 and 10. Now that cells are close enough to display their interior, anything that is not a wall (object, encounter, water, door, projectile, etc.) is always drawn first followed by the related wall panels. Click on the following image to play an animation that shows the order the wall panels and cell interiors are drawn.

Additional decorations that are part of a wall are drawn while drawing the wall and not while drawing the interior of a cell. These decorations are
- Buttons of a raiser wall
- Holes (opened or closed)
- Rollers of a pushable wall
- Standard decorations (ie. green ball, blue diamond, etc.)
- Cupboards (opened or closed) including their related items
Everything is drawn pixel by pixel at a rate between 1.5 frames per second and 12 frames per second depending on the amount of things to draw.