Internal Graphics
Captive graphics are usually rendered from a graphic file found in its directory. The renderer will read the pixel value and bluntly copy it onto the screen. However, some graphics are internally hardcoded into the main application and can be manipulated to offer various visual effects. They are usually just a series of bit patterns that the system sets to an appropriate color when it finds a black pixel on the pattern while leaving white pixels transparent.
Offline Device
 |
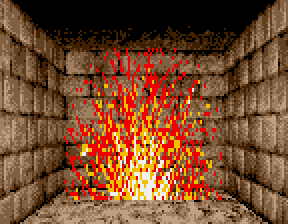
This is drawn when a monitor is turned on while the related device is unavailable. This noise is also used to generate visual effects when bumping onto an object (solid or fire) and generate the image of the Power-Zapper device.
|
Hand Cursor
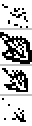 |
Each image correspond to a bitplane of the hand cursor. When overlapped, the proper colors are rendered on the screen. This graphic doesn't require any special manipulation so I can't see why it was created as an internal graphic.

|
Electric Sparks
 |
Each image is a frame overlayed on top of the cursor when it's charged with electricity.

|
Body Scan Images
 |
The first 6 sections represent each body part displayed by the body scan device. The last section is used to draw around the body, creating an outline of a droid shape using its related color.

|
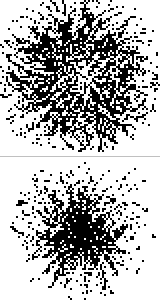
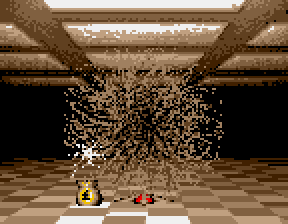
Death Cloud / Explosion
When an encounter dies, a ball of dust (what I personally call a death cloud) appears and shrinks down to nothing. This cloud is stored as 2 separate bitmaps.
Monitor Side Masks
 |
Used to draw both sides of an active monitor.
|
Radar Tiles
 |
This one is visually complex. Each of the 28 sections found here are used from the farthest tiles to the closest, left to right. The system will set the color of the radar tile to a shade of
- brown when it's normal
- white when it's an encounter
- red while it's being scanned
|
Font
 |
|
Each of the 40 characters used by the game. As it follows the ASCII standard, you may notice that the '^' character is replaced by the 'kg' symbol. Bold fonts are also drawn using these characters by indirectly drawing the character a second time 1 pixel to the right. |
Shields
 |
In the game, each line of a shield graphic is separated by a blank line. In order to save memory, the graphic is stored without these blank lines. When time comes to draw a shield, the system will replace each line with the appropriate color depending on the type of shield and animation frame.
|
Anti-Grav device
 |
Like the shields graphic mentionned above, the anti-grav device graphic is stored without the blank lines. If you have a good sense of observation, you may notice that the graphic has 11 lines while the displayed graphic actually uses the first 10 lines. The code is written to use 10 lines, but it can be changed to 11 lines without causing any problems. I can't say if it's a bug or an intentional move by the programmer because it may have been done to give the symbol a rounder bottom.
 |  |
| 10 lines | 11 lines |
|
Recharge / Fixer
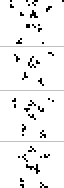 |
Each of the 4 frames of the animation shown while having the recharger or fixer device active. The renderer creates the image by merging 2 consecutive frames into 1. The color of the pixels will be blue for a recharger and red for a fixer.

What's intriguing is how the actual shape of a droid was build out of this. It can't just be "Make black pixels red and white pixels black" because we would then have red pixels into a perfect rectangle of black pixels. The answer comes from the fact that the renderer first converts all red pixels on the monitor into black pixels, and then generates the set of frames by only adding black pixels as red pixels. This becomes the shape of the droid, except for the first frame displayed after the device is activated.
|
Insert Disk Two
 |
This image is displayed when the second disk of Captive is required. The second disk is only required when the floppy disk drive supports only single sided disks. It is made up of 3 shades of blue where a pixel from the first image is light blue, a pixel from the bottom image is medium blue and a pixel from both images is dark blue.

|
Gradient
 |
This internal graphic is present, but not used anywhere. It could have been for an early version of the game as an idea that has never materialized.
|
|